Week 18: Brown Bag Lunch – Homemade Lunchables Pizza

This week’s Brown Bag Lunch challenge dangled the opportunity to poke at my nostalgia buttons and I took a swing at my very own set of homemade Lunchables pizza. Overall, this was a very smart decision.

JPEG image-D70DB9C12195-1

To begin, mini crust discs are made to fit the lunching tupperware I use on the daily for packing snacks for work. Puffing up in oven may be an issue, which can be remedied by a few stabs from a fork beforehand or a bit of pressure from above afterwards.

JPEG image-667A5B9143FA-1

Next the tomato sauce is made by gently cooking garlic in olive oil and then dousing crushed San Marzano tomatoes into the pot for a quick simmer. Fresh basil and dried oregano make up the whole of the spices used.

JPEG image-7C5203FE6EBF-1

Raw ingredients may vary based on personal preference but fresh tomatoes and pepperoni are great toppings of choice.

JPEG image-2B3F662A6476-1

A quick mix of cheddar and mozzarella made for a wonderfully complex assortment of cheese aromatics. For further instruction on preparing a two cheese blend, this brief video guide can provide the necessary guidance for mastery.

JPEG image-207162CEF148-1

Staging is key in creating a bag meal experience. For the majority of my packed food needs, I turn to a set of Rubbermaid kits I found at Costco once long ago. They just happen to fit the REI lunchbag I bought just as long ago.

JPEG image-571E10EDD635-1

Being the responsible worldly thinker that I am, I chose to feature my handy-dandy reusable lunchbox as my “brown bag” for this project. Stocked with plastic utensils and an icepack, all this lunch needs is a nice view and a cool breeze.

JPEG image-9AA5B761F2AF-1

The build is simple. A microwave or toaster oven can zap this mini pizza into a blissful dance through a flavor meadow, but the extra effort can be easily overlooked when hungry.

JPEG image-79DD3F42BF33-1

If wine is an option, rosé or lambrusco can make a daytime meal sing. If a lunch is forgotten until the later hours, a Louis Latour red burgundy can transform a Lunchables adventure into an epic midnight snack.

Week 17: Medieval – Spiced Almond & Pomegranate Cornish Hen Pizza

To kick off Season 6 of Game of Thrones, Reddit’s r/52weeksofcooking has called for a medieval style dish to sustain us through the first episode airing tonight. The pizza constructed to fulfill this requirement began with a 16th century sauce recipe designed to go with partridge or hen. The spice-heavy sauce calls for flavors of cinnamon, ginger, pomegranate and white almonds.

JPEG image-E47AD217CD1A-1.jpeg

The ingredients are pummeled into a mildly gritty texture to recall the days without blenders.

JPEG image-E6E2D650DCBB-1

A cornish hen takes the leading role of this pizza. Before roasting, a savory mixture of spices featuring cumin, allspice, paprika and cinnamon is rubbed over the skin for extra flavor. During the cooking and resting period, the crust is prepared.

JPEG image-99B7FFB27652-1

While the sauce does not win any pretty awards, it tastes like wintertime. A flurry of ricotta and mozzarella, both fair game cheeses according to White Oak Historical Society, are added for a bit of extra heartiness.

JPEG image-6F40792A87DE-1

When the hen is done resting, the thighs are sliced and added to the pizza with their crispy skin accompanying. With the meat cooked, the crust is crisped up in an oven of 550°F.

JPEG image-42339E257531-1

The legs are set aside for presentation purposes. This pizza is ready to be spanked on the bottom and sent out to the hungry masses for devouring.


JPEG image-4A9D693D40F3-1

To step these slices up from peasant food to slices fit for noblemen, a quick sprinkle of sliced almonds and pomegranate seeds really jazzes up the presentation.

JPEG image-AB443F6DB93E-1

There is no better way to wash down a medieval experience, especially one gushing with cinnamon and spice, than a dainty chalice of cider (Eric Bordelet, Normandy, France), which also happens to make a great drinking game accompaniment at 4% abv.

And since nobody ever seems to find the gifs tucked away in each post:

game of thrones

Week 16: Root to Stem – Shaved Asparagus & Ricotta Pizza with Stem-Infused Whole Wheat Crust

This week is a challenge that speaks directly to the most wasteful aspects of my cooking. While I do my best to make stocks out of bones and stems to feed my soup-making habits, my creativity stops there. The asparagus used to top this week’s pizza will find their cheesy ricotta home built above a crust interlaced with nutrients leached from their usually-discarded stems.

IMG_4741.JPG

The process was as simple as using a stock created from the stems to substitute for the water used in the crust.

IMG_4744

From here, regular pizza-making resumed. The yeast frolicked in the warm asparagus water that made up their new home and went about business as usual.

IMG_4743

With extra nutrients fortifying the dough, I decided to make a whole wheat flour to create as healthy a pizza package as I could stand without stripping away the essentials.

IMG_4746

Shaving the asparagus was both equal parts time-consuming and oddly-satisfying. There are core portions that could not be shaved down due to mechanics, thus they were chopped up for additional texture.

IMG_4748

The cheese was a simple mixture of ricotta, lemon olive oil, lemon zest and lemon juice.

IMG_4747

The lemon olive oil can really help make any citrus flavors pop. I used it as the base sauce for the rest of the flavors to play off of.

IMG_4750

At 550F, pizza doesn’t take much longer than 8-10 minutes in the oven.

IMG_4751

The crust was perfectly chewy with a light crisp to the bottom. To keep the texture more appealing, the shavings of asparagus were each swirled into a gusty little toppings, which were admittedly rather time-consuming to stage as well.

IMG_4752

The effect was worth the effort.

IMG_4755

With a dab of coarsely-ground black pepper on top and wine nearby, these puppies were ready for quick consumption.

IMG_4754

The wine was a Gruner Veltiner, chosen for the qualities it would mirror in the pizza, such as the waxy vegetal notes, peppery aromas and the overall clean style. Neither of the two survived the night.

Week 15: Brazilian – Cast Iron Chicken, Requeijão & Heart of Palm pizza

To knock out a killer Brazilian-themed dish the week of my wedding, I decided to make a quickie cast-iron pizza using ingredients sourced from a gem of a shop selling all things Brazilian cuisine. Using shredded roasted chicken, requeijão and heart of palm, I constructed a delicious tortilla pizza, which was then paired with Provençal rosé that was to be served at my wedding two days later. The picture parade to follow will have just a brief overview the details of each step involved.

IMG_1786 (1)

Requeijāo cheese is a gooey, mild cheese adored in Brazil with many uses. Heart of Palm seem to have a fanciness to them I don’t yet quite understand. Working with both is a treat since I really don’t know what I’m doing even a little bit.

IMG_1788 (1)

The heart of palm seems to break apart in a rather satisfying way. The goal here is to blend it alongside the pulled chicken for a streamless sense of texture.

IMG_1791 (1)

With chicken and heart of palm combined, a little cheese is added and the whole is mixed for consistency.

IMG_1787 (1)

The tortilla is placed over a well-warmed skillet and topped immediately: first with a coating of requeijāo cheese, then the bulk of the payload, then a sprinkle of cheddar.

IMG_1792 (1)

Once dressed, the skillet is taken off the heat and placed in a pre-warmed toaster oven of 400 degrees F.

IMG_1793 (1)

For funsies (and tasty green notes), fresh chives are chopped for the final plating.

IMG_1795 (1)

Meanwhile, rosé is popped to accompany such a quick, light meal.

IMG_1794 (1)

Mmmm.

IMG_1797 (1)

There’s no other way to be.

Week 13: Breads – Pepperoni Monkey Bread

For this week’s challenge, I revived a past memory of making pepperoni monkey bread as inspired by a cover recipe of Cook’s Country not long ago. Without the actual recipe in hand, and without all the necessary kitchen gear, I put together the best monkey bread my semi-stocked refrigerator would allow.

To begin, I rolled out a long sheet of leftover dough from a previous pizza thrill. The contents were then wrapped up into a tight roll for chopping.

IMG_1757

Inside were layers of mozzarella, cottage cheese and pepperoni.

IMG_1755

While chopping up the roll into bite-size morsels with a dough scraper is a handy use of a specific kitchen tool, not having a bundt pan is a somewhat difficult piece to find an equivalent for. For this semi-blind experiment, a cake pan with a centered ramekin will have to be sufficient.

IMG_1759

The chopped pieces were placed in a calculated, galactic pattern around the ramekin (which would later serve a dual purpose) and pressed into a compact form for baking.

IMG_1760

The results may have been messy with pepperoni and cheesy bits poking out, but the final product envelopes much of the clutter while still inviting a piece to be pulled off and dipped into the marinara that fills the center. To make savvy use of time, the marinara is best placed in the ramekin a couple minutes before the bread is finished setting.

IMG_1761

The marinara used here is my go-to recipe of San Marzano canned tomatoes cooked down briefly with a pinch of torn fresh basil, salt, sugar & red wine vinegar. When dipped, a piece of monkey bread transforms into a condensed pizza bite. It was really, really difficult not to eat this entire thing is one sitting. So that’s quite exactly what I did…but not without wine.


IMG_1762

COS is a killer producer from Sicily that I especially enjoy for the concentration of red cherry in its red wines balanced with the more savory, licorice elements the wines often display. While this 2011 Cerasuolo di Vittoria Classico displayed a bit more age than I had hoped, the pairing is still sound with the boldness of juicy fruit and brightness of acidity that Italian wines are known for that will help to balance the classic pizza flavors in this dish.

IMG_1764

So I very thoroughly slaughtered both food and wine and have zero regrets.

Week 11: Malaysian – Chicken Curry Roti Canai pizza

To slam dunk this week’s challenge, I took on two Malaysian standards that are often served together and used kitchen wizardry to morph the duo into a pizza. Roti canai, a ghee-heavy flatbread designed to trap pockets of air between thin layers of dough, is an ideal base for a pizza. Its usual partner, chicken curry, makes for a topping worth exploration. To begin, I slathered myself with ghee and dove into making roti canai from this very detailed recipe.

Roti Canai

IMG_1282

The formation of the dough is rather straightforward, requiring much kneading to acquire an incredibly smooth texture and a minimum 6 hours of resting time before the shaping begins.

IMG_1283

Each batch produces many sets of roti canai, which are divided evenly before the dough is allowed to settle.

IMG_1285

Each of these puppies has the ability to stretch out mega thin. Malaysian vendors keep some pretty dope moves to slap the dough into shape. Incapable of such performance, I managed to coax out a set of comparably paper-thin dough sheets with some delicate moves.

IMG_1284

Once stretched out, the paper dough is folded over itself to create air pockets and then swirled into a disc. This little creation sees a brief resting period while a pan gets hot on the stovetop.

IMG_1286

These wound-up formations offer some resistance to stretching despite their original malleability. Stretching the dough by hand offers a small amount of give but the final shaping is best accomplished immediately after the dough is placed in the pan. With a ghee-greased spatula, the roti canai is untraditionally smashed and flattened into the sturdy, circular shape that is required of a pizza crust.

After building the roti canai, I turned to a BBC curry recipe for the majority of my cooking guidance.

Chicken Curry

IMG_1270 3

The process begins with making a curry paste made up of a good majority of the stronger aromatics that will be experienced such as turmeric, ginger, lemongrass and red peppers.

IMG_1271 3

For those enamored with tradition, a mortar and pestle can do the work of a food processor with the addition of a few extra minutes and intensive upper body labor. I opted for the wine-sipping version of this pummeling session.

JPEG image-E1F33FD28D1C-1

The bulk of the curry consists of chicken thigh, onion & potatoes.

JPEG image-AC27B6E693C2-1

These additions will be the main pizza toppings and act as a curry delivery system as they will be slathered in it.

JPEG image-7DA85239A472-1

The onions are allowed to soften and become fleshy before adding in the chicken, potatoes and the remaining pieces of the curry, which include coconut milk, chicken stock, soy sauce and final spicing agents. Cinnamon sticks and star anise offer surprisingly subtle but necessary aromatics. To make up for a lack of kaffir lime leaves, bay leaves and lime zest were used after finding this helpful substitution guide in a sea of unhelpful websites insistent that there is no worthwhile alternative to the real thing.

JPEG image-21F409748C94-1

To keep the curry sauce tight, I reduced this batch down a good amount so that the pizza would not be dripping over the sides when applied.

JPEG image-8EC317DEF084-1

The pizza formation was pretty straightforward once the cooking was completed. With every element made fresh, no time in the oven was needed and the dish was served hot.

IMG_1298

The experience of eating this pizza was more satisfying than anticipated, especially in terms of texture and integration of flavors. The dough was so thrillingly soft and chewy while the chicken and potatoes were tender but able to add character. The heat didn’t jump out but rather mingled with the rest of the components, and the sauce was boldly savory without any one aromatic dominating. I devoured two sets of pizza in one sitting, but not without wine.

IMG_1300

To pair with the curry pizzas, Vols – “Vols II,” Riesling, Spätlese, Wiltinger Braunfels, Mosel 2014 had just the right touch of sweetness to combat the heat while its searing acidity cut through the richness of the coconut curry. The nose is flooded with petrol and lime zest while tart pineapple and brilliant slate minerality make up the palate. This is a beautiful wine all on its own but can really complete an experience, as it did here.

It’s successes like this that make me bananas for a group like r/52weeksofcooking.

kevin running wild


Week 10: Braised – Beet, Fennel & Goat Cheese Pizza

This week’s braising challenge is a considerably useful method of cooking that has only come up in our kitchen when brussel sprouts or potstickers are involved. In the case of the former, brussel sprouts had long baffled us as to how to best cook them without a long roasting process. Braising allowed for a quick sear to create the tasty bonus flavors offered by the Maillard reaction while accomplishing the tenderness sought out at a fraction of the time it would take in the oven.

For this pizza, I chose to discover the braising potential of fennel, a hardy root vegetable that can charm or dissuade any indulgers with its vibrant anise aromatics. Having only recently succumbed to fennel’s appeal, I am still in a rather obsessive phase that peaked this time last year with my addiction to fennel & grapefruit soup. Here, the flavors of fennel and some of its dear friends will come out and frolic.

JPEG image-C25B6172F98B-1

Sharing the spotlight on this pizza is fennel’s root vegetable buddy, beets. Even in the grocery store, they are already rather neighborly.

JPEG image-70B66FBBD467-1

With the help of a mandoline, roasted beets were thinly sliced and prepped for a marinade.

JPEG image-F04899F8D068-1

Before juicing the grapefruits for the marinade, I included the grapefruit zest to allow the tart flavors to pop. A splash of red wine vinegar helped bolster the marinade.

JPEG image-1A8B4A3D2C9F-1

When it comes time to braise the fennel, only the bulbous base was used while some of the fronds were reserved for the final plating.

JPEG image-61067E68401D-1

Using a knife this time, I sliced the fennel carefully so as to best preserve the architecture within. During cooking, each portion was flipped methodically with tongs to keep the structure in tact for the final presentation.

JPEG image-32E43613E24F-1

The pizza was built using a somewhat puffier crust that had boiled potato shavings folded in for a fluffier texture. The final toppings included the grapefruit-marinated beets, fennel, goat cheese and a sprinkle of mozzarella. Shaved almonds and fennel fronds dressed the pizza upon its completion.


JPEG image-FDAAB1B2E29A-1

While keeping an array of fun flavors, this pizza lacked a sense of moisture as its creator didn’t think to incorporate some semblance of a sauce. Taking a cue from the clam pizza from last week’s challenge, a quick spritz of the beet marinade may have saved this pizza from its shortcomings. Beyond this, the flavors meshed well enough to be completely devoured, but there was a certain integration lacking. The wine, in this case, helped bridge some missing links in the dish.

JPEG image-D1CB22A2290D-1.jpeg

Chosen to pair with this pizza, Domaine Eric Louis – Sancerre, Loire Valley, France 2014 keeps a fresh and lively style of Sauvignon Blanc behind its cutesy Little Prince-esque label. Its natural affinity for goat cheese is aligned with a geographic history within the Loire Valley. The region’s Sauvignon Blanc has been enjoyed with the local and abundant goat cheese for so long it seems almost too perfect, and yet it is one of the few true classic pairings that is cherished for its simple dance of tangy, refreshing flavors. The aromatics of the Sancerre pile onto the flavors of grapefruit and herbaceousness in the pizza with a similar roar but the bitterness found in lingering after each bite admittedly might be better managed by the roundness of a slightly off-dry Riesling.

JPEG image-77FC9F2C4E3D-1.jpeg

Even still, neither pizza nor wine made it through the night.

Week 6: Finger Foods – a trio of pizza snacks

Exploring the miniature world of pizza-inspired finger food, as decreed by this week’s challenge, I decided to experiment with three different styles to see how far whimsy could take me. To begin, I chose to bring to life a mediocre pizza cone I once experienced at a night market but this time it would be tastier and in bite-size form.

Pizza Cones

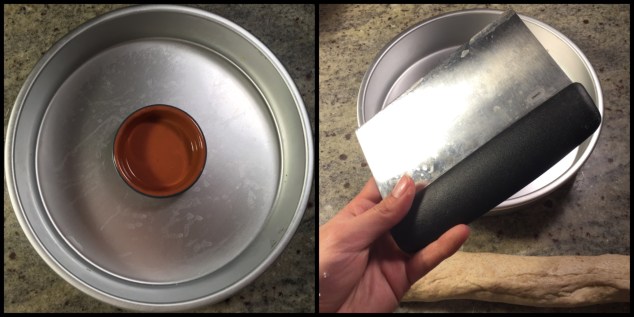
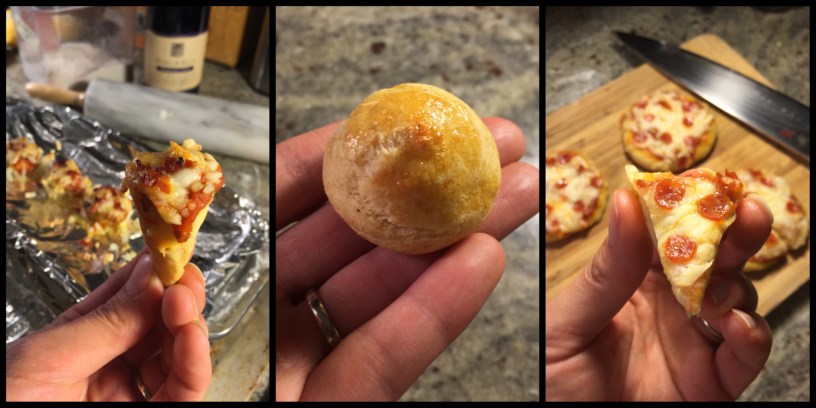
Ideally this project would begin with an army of small cone-shaped, oven-safe items such as a basic frosting tip, at the ready. If this is not the case, the next best option is to create a set of Cones of Dunshire out of foil.

JPEG image-3BD190DFAAA6-1

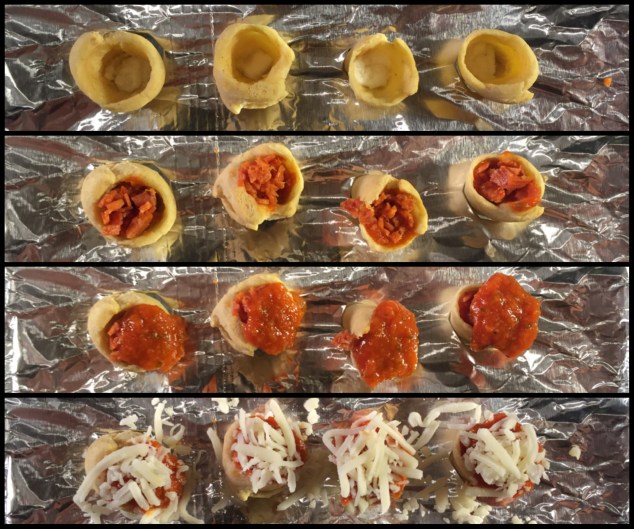
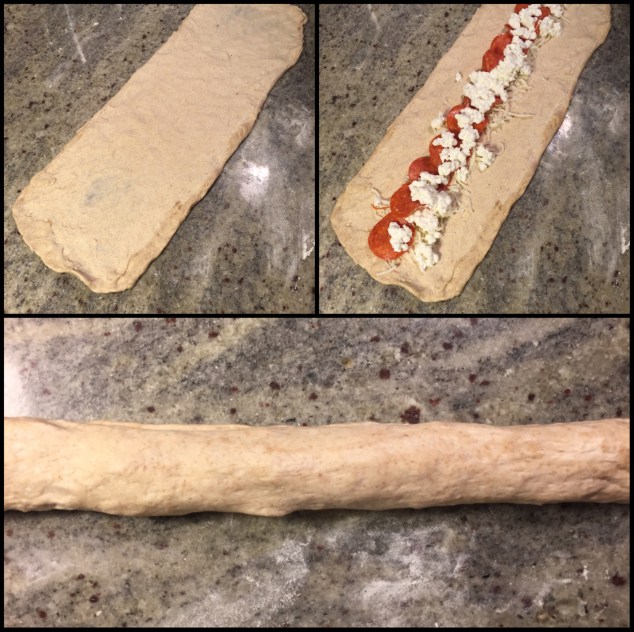
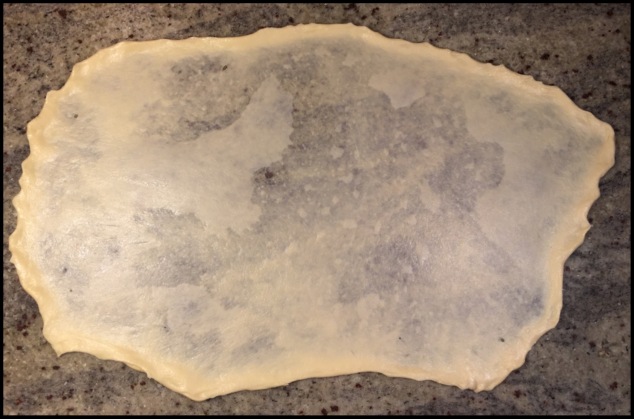
Using room-temperature pizza dough, I rolled out thin, roughly-shaped triangles that were wrapped once around each cone. The cones were baked pointy side up until browning and gently release from mold when cool enough to do so.

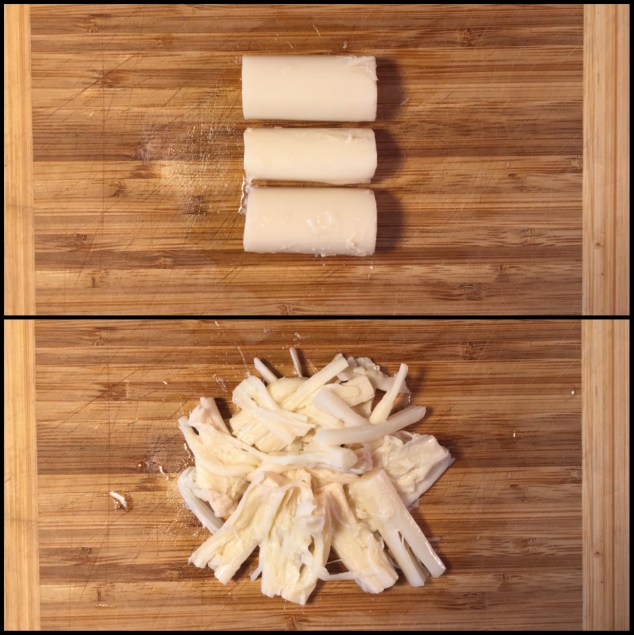
To prep for the next stage of cooking, foil was wrapped tightly around a baking dish and gently poke tiny, well-spaced holes for the cones to sit upright in. These cones were filled with a modest layering of fresh mozzarella, marinara sauce, finely chopped pepperoni, more sauce, and shredded mozzarella to top.

JPEG image-4CD72F78BFBB-1

These were placed back in the oven for another 5 minutes and served in the very same delicate DIY foil holder as before.

JPEG image-7FE202479377-1

While the presentation is lacking a bit of panache, these small treats have potential for greatness in the future, especially if I combine the piping mousse used in the following finger food.

Pepperoni Cream Gougeres

Gougeres are small pastries that create little air pockets when they puff up in the oven, providing space for a creamy treat to be piped in.

JPEG image-9A151BCF907D-1

While these might be considered the most successful of my experiements, I encountered many difficulties along the way. Using a very basic recipe provided by the Addison kitchen, I had a batch ready to go within minutes.

JPEG image-C0372E3FD6C8-1

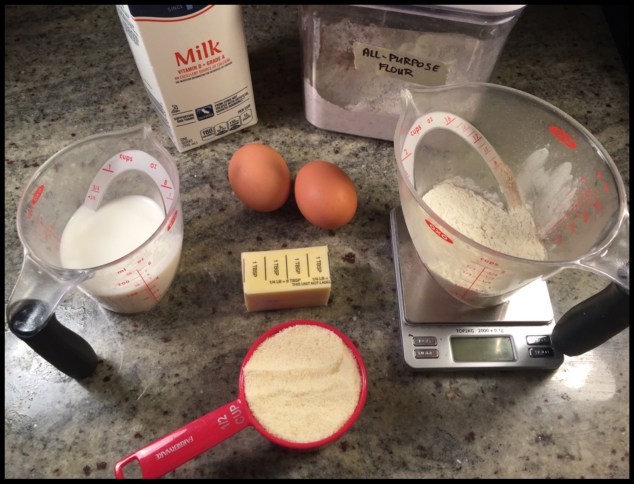
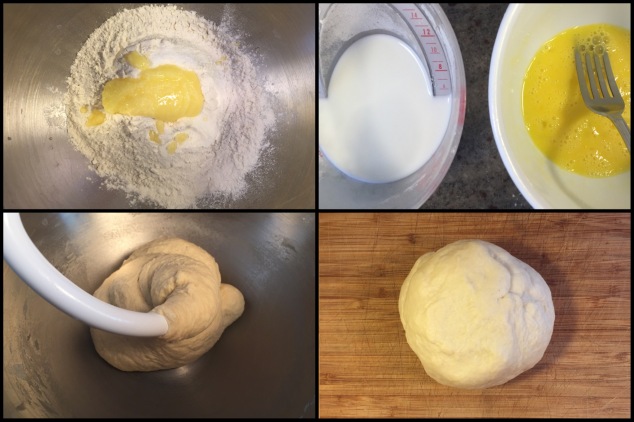
Boiling the butter and milk together, I added the flour all at once and beat the resulting goop for three minutes. Off heat, I whipped in the eggs one at a time and then added parmesan and season with salt to taste. This was then added to a pastry bag, though a sturdy ziplock bag would make a fine enough substitution.

JPEG image-91BF30592A1B-1

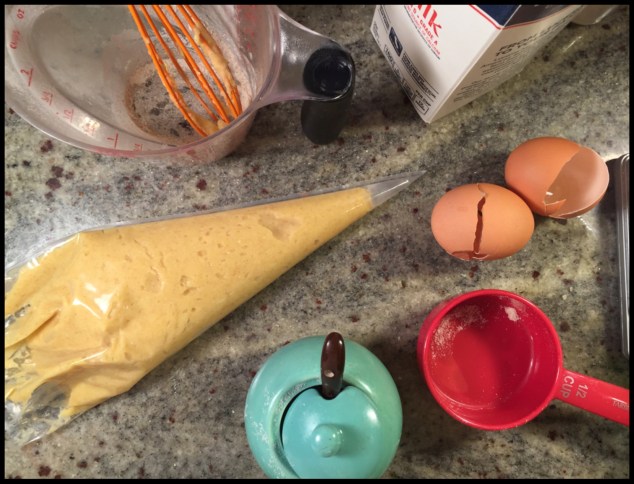
Piping out small swirly poops was my first mistake. The shape created at the base of each pastry did not allow half the batch to rise with the appropriate amount of spacing within. It is better to start with a fat blob as the base, swirling towards the top to avoid a Hershey kiss shape.

JPEG image-476D9246B533-1

Each batch took around 20-25 minutes in the oven before crispy and light. Midway through the first batch, I noticed the color of the gourgeres remained quite pale so I pulled out the lot and painted on a sheen of whipped egg whites for some last minute coloration in the oven. The trick seemed to work so I applied the egg whites to the second batch as well.

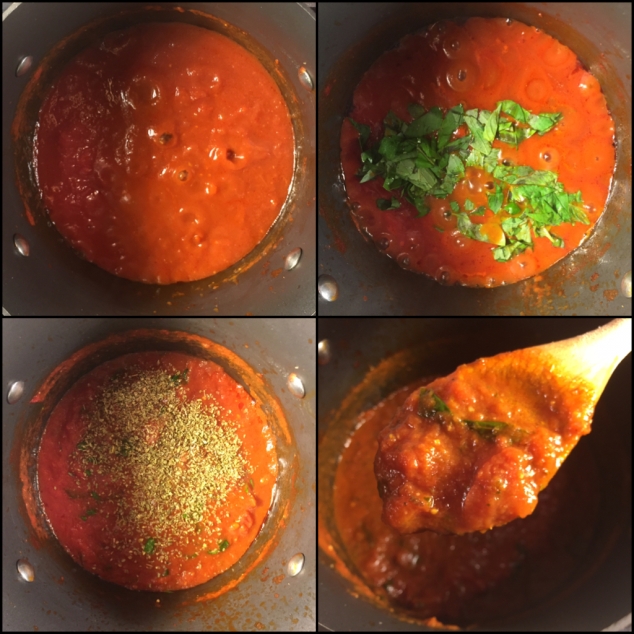
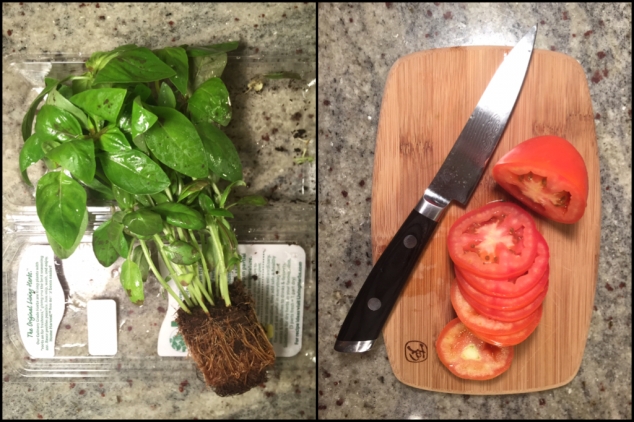
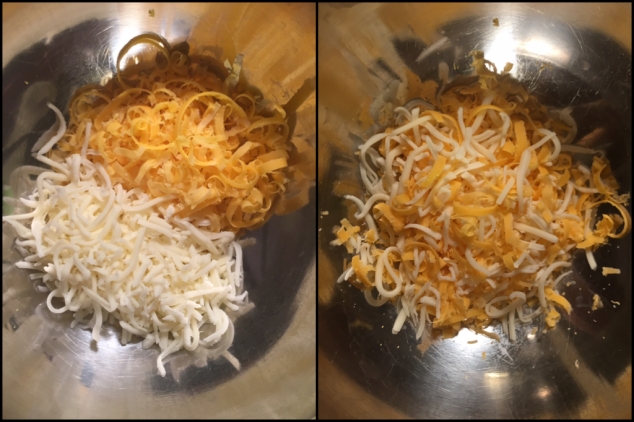
While waiting for the pastries to finish baking, I pulled together some pizzaesque ingredients laying around in the kitchen for a haphazard emulsion. The final makeup of this concoction involved a blend of tomato chunks, mozzarella, sour cream, cottage cheese, half and half, crushed red pepper, salt, pepper and crispy pepperoni. This was added to its own pastry bag and piped into the cracks found along each puff pastry to fill the gap within.

JPEG image-5EA87828C3AB-1

At first I didn’t mind the chunky texture the pepperoni provided until the pastry bag tip kept getting clogged and splattering comically all over the kitchen from force and frustration. Had I made a bigger batch, the end texture may have been smoother as the pepperoni would have a chance to become completely emulsified. In addition, I would avoid using firmer cheeses so that the mousse remains creamy when reheated. Another couple rounds of practice should transform this puppy into a winner in a crowd.

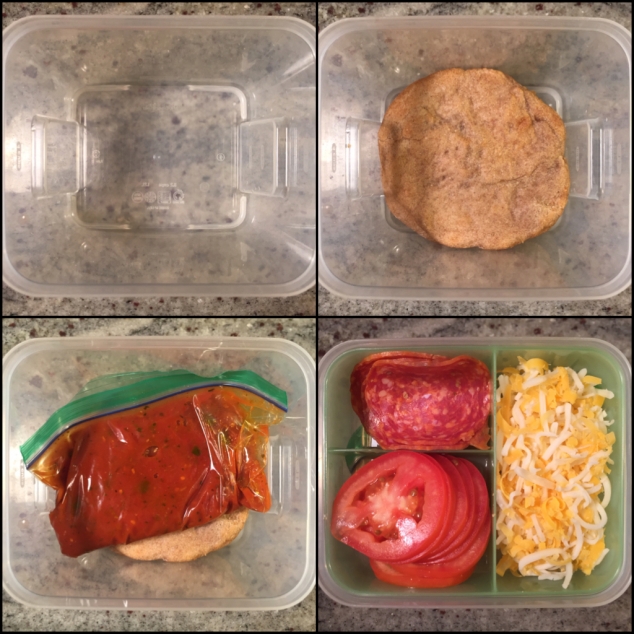
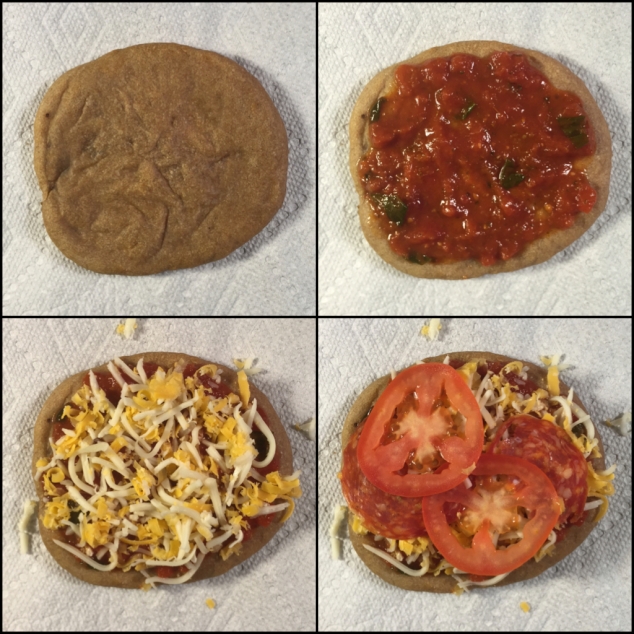
Mini Pepperoni Pizzas

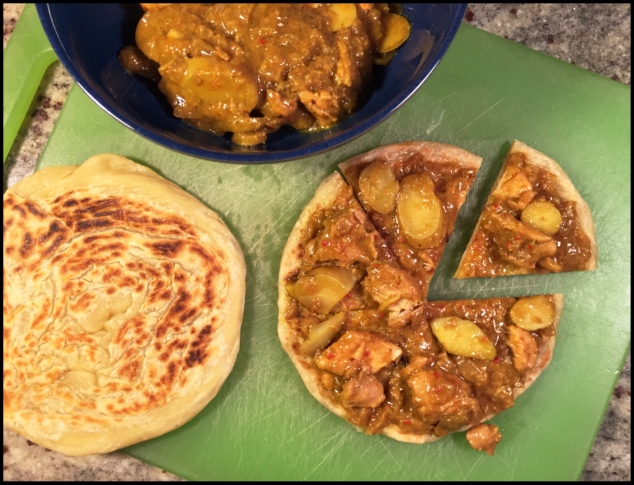
Despite my certainty that this would be the least exciting aspect of my finger food experiments, I devoted a good half hour into this project to use up some leftover dough and ingredients. The majority of this half hour was spent meticulously cutting regularly-sized pepperoni into miniature pepperoni pieces, all for the cutesy look of it.

JPEG image-F997ABDC27C3-1

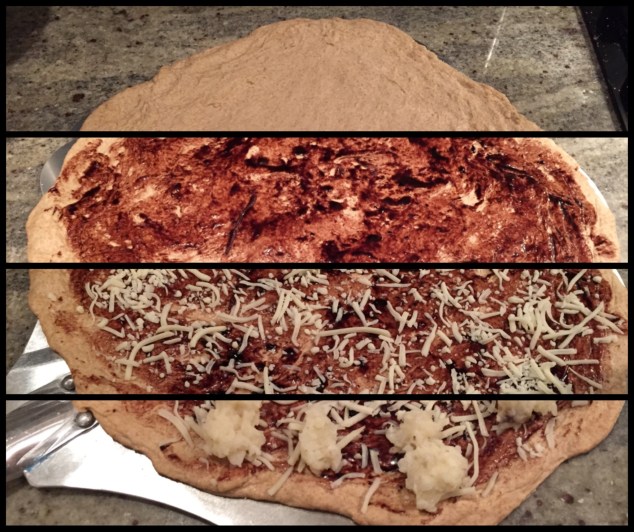
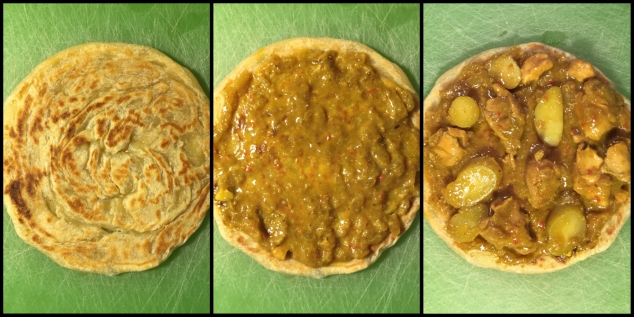
From here, the dough was separated into equally-sized balls that, when pressed into shape, resulted in 3-inch rounds. And from here I built the pizza as I would any other.

JPEG image-AFA90221AAD1-1

The pepperoni scraps from earlier did not go to waste as they were chopped up and placed over the sauce and under the cheese when designing the final toppings.

JPEG image-D1CE2903E83E-1

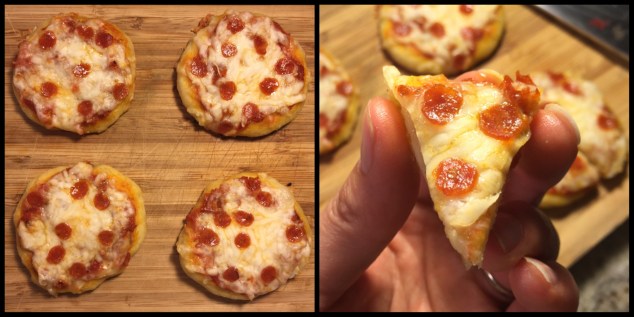
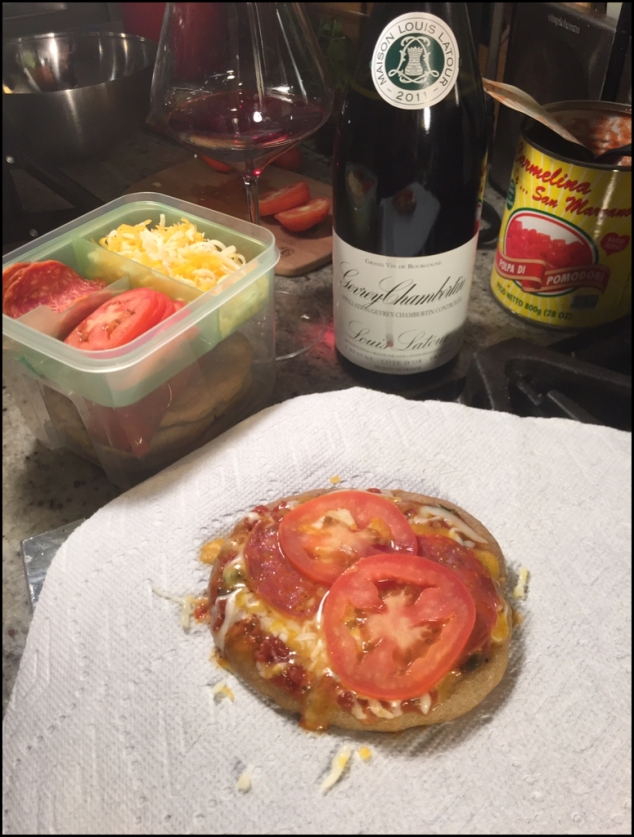
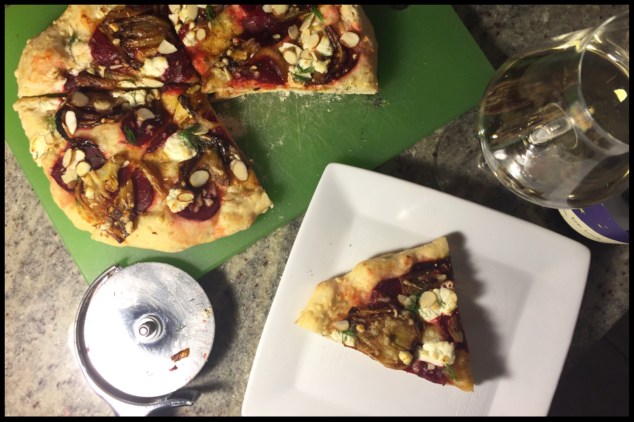
Edible? Yes. Cute? Sure. Worth it? Eh.
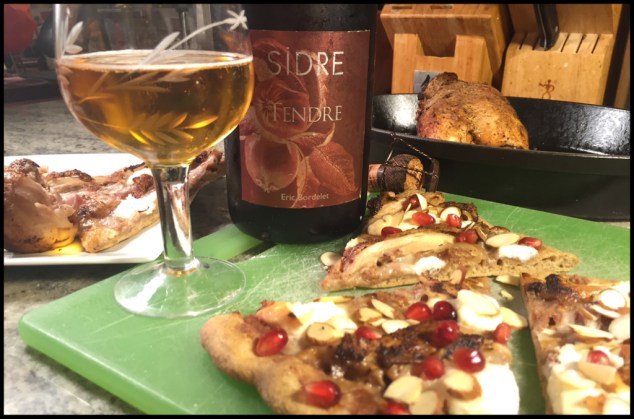
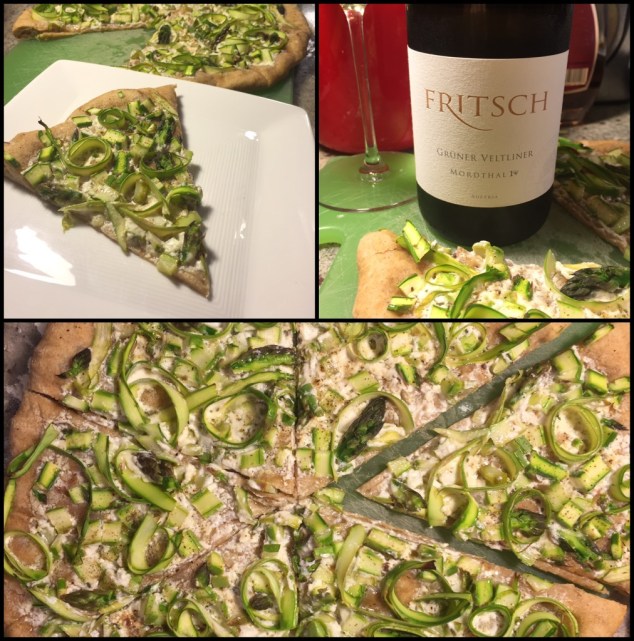
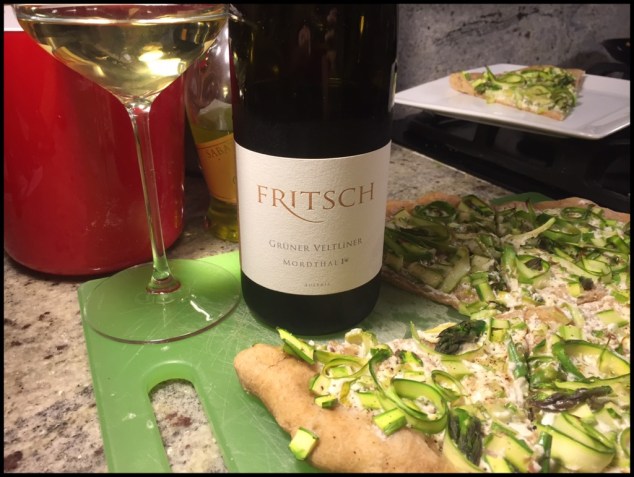
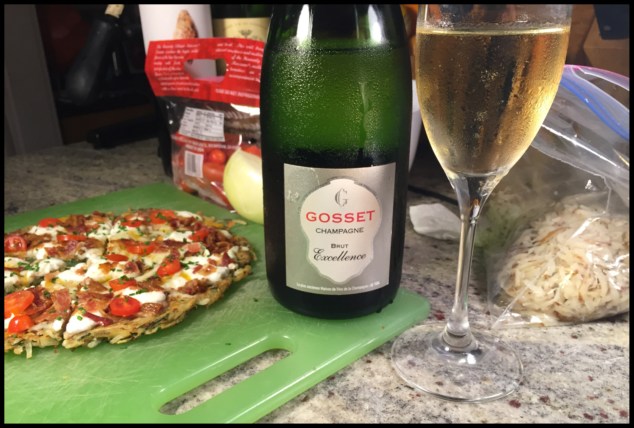
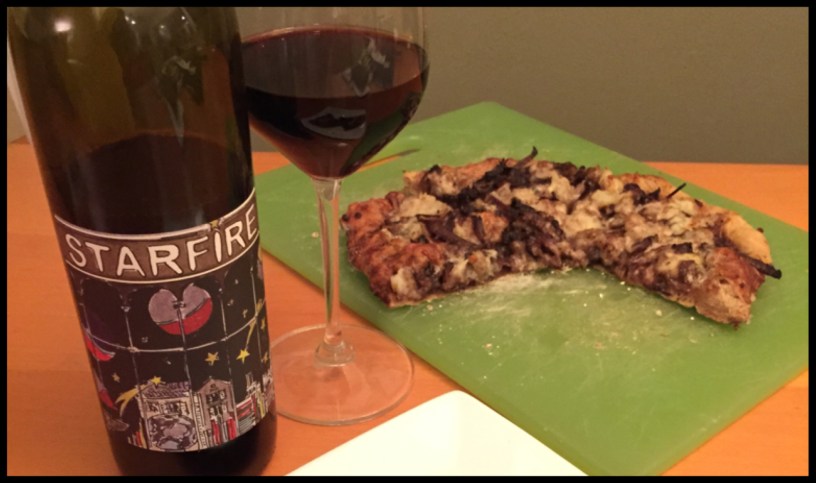
The Pairing

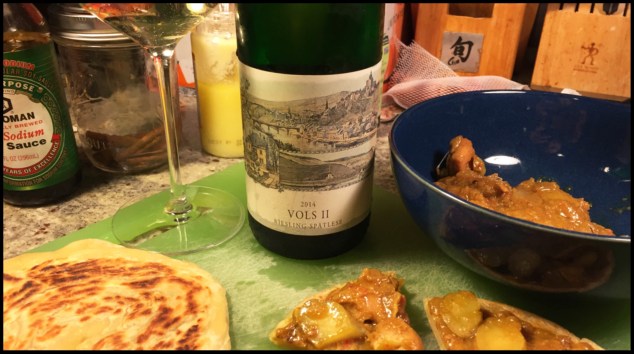
While the flavors of these three treats were very similar overall, I would still need a wine broad enough to span the nuances of spices and texture. When it comes to classic Italian flavors of tomato and cheese and cured meats, I tend to seek out Italian wine.

JPEG image-93C771649D23-1

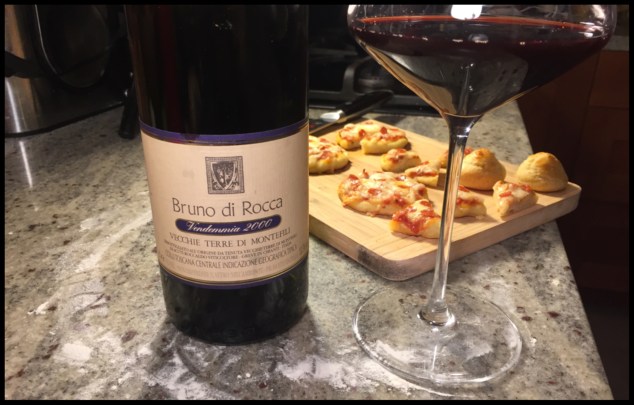
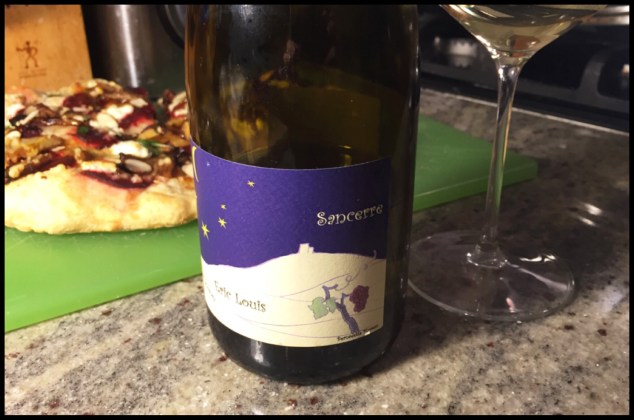
Vecchie Terre di Montefili – “Bruno di Rocca,” Toscana, Italy 2000 is plush, rich and easy to become friends with. While a decade and a half of aging has definitely pushed this wine into its developing stages, there is still a dense juiciness to the black cherry and raspberry fruit that can manage to the pastry-dense food. The wine’s age offers the additional benefit of extra complexity by emphasizing more savory components like black tea and chopped mushrooms. This wine is just as fun to drink with the food as it is to drink during its preparation.

Week 4 – Brunch: hash brown breakfast pizza

At the dawn of this week’s challenge, it was clear a simple breakfast pizza, softball it may be, would be all too straightforward. With three-pounds of homemade hash browns squirreled away in the freezer for any and all breakfast burrito needs, I knew I could tap this stockpile for the base of this next project. This particular batch of hash browns was made with particular care in an effort to perfect this brunch-time afterthought. I did okay. The thawed hash browns were still soggy with moisture I had failed to wring out of them. Luckily, it wasn’t too late to correct this problem with a minor squeeze session over the sink. When it came time to cook, I could only hope my efforts would provide a crispy enough base that could be spread thin while also supporting the extra weight of toppings.

Hash Brown Breakfast Pizza

To begin, preheat the oven to 350°F and toss in a couple pieces of bacon until crispy (approximately 12-15 minutes). Oven-cooked bacon is one of the many life hacks that has so many benefits it should have its own brochure. Not only does it provides complete control for even cooking, it also frees up the stovetop, makes clean up easy and keeps those damned grease pops safely tucked away.

JPEG image-3D896F2E110E-1

Meanwhile, the bacon fat rendered can be used in cooking the goodies up top.

JPEG image-B7737871C2B8-1

Just as with latkes and fritters, a binding agent is needed for the hash browns to hold its shape, which in this case is the shape of pizza dough. One medium egg is scrambled and tossed with the potatoes, plus some chopped yellow onions and chives for some pizzazz.

JPEG image-51EEAD4D7DAA-1

The mixture is spread into an oiled steel crepe pan over medium heat, evenly spread out and smushed into the natural circular shape of the pan. Once set in place, the potatoes are not to be fussed over until the bottom begins to crisp up (approximately 3-4 minutes).

JPEG image-B2B8BF1F2129-1

The trouble now is the flip, which is why the crepe pan is preferred for its mildly-sloped edges. Using a spatula, loosen the hash browns from the pan all around so that it can easily slide off onto a cutting board, cooked side down. Having very lightly coated the pan in oil again, flip the pan upside-down over the potato disc and then quickly flip the cutting board over to place the potatoes cooked-side up in the pan. Cook over medium heat while placing on toppings of cheese and bacon.

JPEG image-410BF512E637-1

Place the crepe pan, again crucial for its metalware, into the oven to melt the cheese fully. To secure this pizza in the breakfast realm, an egg can be cracked over top and cooked until soft at this time. After pulling the pizza from the oven, the spatula is once more utilized to carefully move the pizza onto a cutting board. More toppings of tomato and finely chopped chives are added just before serving to keep their delicate textures intact.


JPEG image-61388EF4C775-1

The pizza is pretty outstanding. The mix of cheeses (cheddar, monterey jack, mozzarella and cottage cheese) provides a medley of textures ranging from chewy to creamy. The gently-cooked onions offer a layer of extra flavor in each bite, the tomatoes pop with a subtle juiciness and the bountiful heaps of bacon on top and bacon fat throughout do not go unappreciated.

JPEG image-56330DAED5A7-1

As for wine, what better way to preserve the traditions of brunch than to pair this pizza with Champagne. All the grease and cream and fat of brunch dishes can easily be whisked away by refreshing bubbles and crisp acidity while more delicate mainstays like eggs are heightened by an equally light wine.

JPEG image-A48F418C12ED-1

Gosset – “Excellence,” Brut, Champagne, NV, the entry-level offering of the house, is the most complexity needed when brunching. There are hints of limestone and toasty brioche in the glass, and while there is a muskiness in the wine that mirrors the earthy elements in the pizza, the aromas do not inspire much reflection. It’s thoroughly enjoyable without the pressure of having to talk tablemates out of adding a splash of orange juice.

For those who indulge in this brunchtime combo, consider keeping sour cream close by for a truly hedonistic experience.

Week 2 – Sous Vide: Short Rib & Mashed Potato pizza

Upon the insistence sous vide websites or books everywhere, short ribs are the showcase piece for this next pizza project. According to these various resources, short ribs can take anywhere from 12 to 72 hours, depending on preferred texture.

IMG_7004

I decide to try a 72°C bath for about 24 hours so the meat would be just beginning to fall off the bone. As short ribs are new to my kitchen, a 24-hour projection allows wiggle room for mistakes, one of which almost flopped the entire pie in its final stages.

IMG_7005

The half-pound of bone-in short rib purchase looks somewhat scant, but for a single pizza it proves to be plenty. To keep to the classics, mashed potatoes a la sous vide seems a fitting accompaniment for the ribs. Getting saavy with russett potatoes, the outsides are cut for potato skins for immediate enjoyment.

JPEG image-4BBC6C8C7E53-1

Meanwhile, the fleshy insides were wrapped up and tossed into the sous vide in the final hours of the short ribs’ bath. After taking the short ribs out to begin building the sauce, I upped the temperature to 90°C for the final 20-30 minutes for the potatoes to soften just enough.

JPEG image-FCDF5B8B49C3-1

For the sauce, I made a red wine reduction steeping yellow onions, shallots, garlic and thyme aromatic richness while amping up the savory elements by adding in short rib juices, duck fat and a quick dribble of sherry vinegar.

IMG_7006
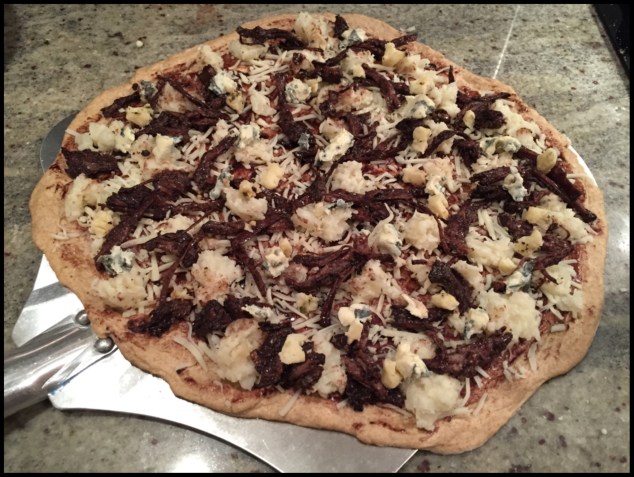
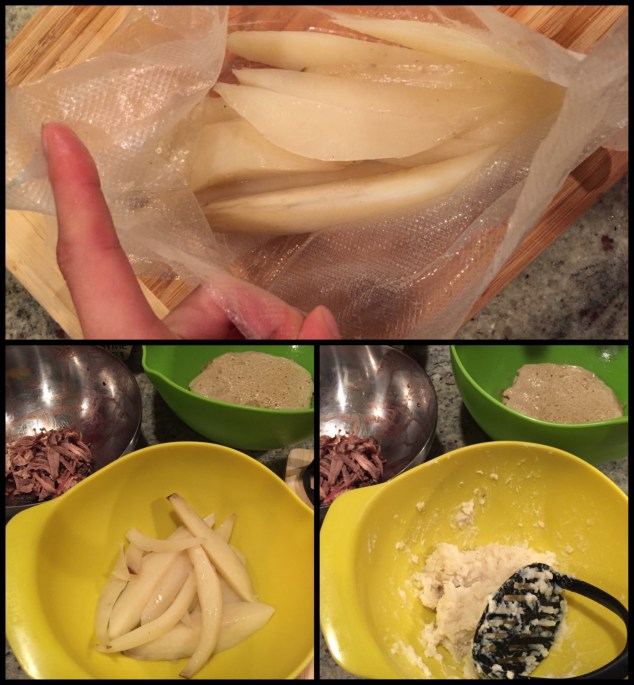
While the reduction finished, I shredded the short ribs and hand-mashed the potatoes to a chunky texture.

IMG_7007

Preheating the oven to 550°F with pizza stone in place, I rolled out a homemade whole-wheat dough and built the pie using the reduction both as a sauce and a short rib glaze.

JPEG image-094393330047-1

To accent the mozzarella base, I topped off chunks of St. Agur, a winner of a blue cheese, and Marco Polo, a cheddar that derives its personality from cracked green and black peppercorn.

IMG_7008

When it came time to pop the pizza into the oven, I realized I had made a huge mistake. The weight of the ingredients and the crust itself can be enough to cause the dough to stick to its resting place, especially when not enough flour and cornmeal is used in preparing the peel. This can also be remedied by using parchment paper.

The whole night’s effort came dangerously close to getting scrapped, despite having poured all of the ingredients into the one pie. Fighting to maintain an already strained patience, I managed to salvage the majority of the pie, cutting off a crescent sliver, which eased my ability to flour underneath section by section until the pizza came loose from the peel.

IMG_7009

The end result is not the prettiest, but the flavors are still in tact. With eyes closed and wine in hand, the end result is still rather satisfying.

With notes of peppercorn and savory richness, this pizza calls for a bold red with the same kind of instant gratification that comes with comfort food built upon comfort food. Starfire (Columbia Valley, Washington 2006) is a fleshy, indulgent Bordeaux blend with a moderate range of more exotic aromas such as black licorice, fresh mushrooms and wet forest leaves. The splotches of blue cheese can be pushy and challenging, but the wine overcomes with creamy waves of plush dark fruit. The red wine reduction mirrors the inherent sweetness of the fruit while occasional bursts of peppercorn on the pizza enhance the earthy aromatics.

If I could change anything about this pie, I’d switch out the whole wheat flour for bread flour to gain a smoother texture, distracting less from the winning topping here, the mashed potatoes. That and I would have remembered the damn parchment paper.